

The first time I tried to spool a spinning reel, I filled it with line that had more twists than a rope swing. My first cast with that rig turned into a bird's nest that took fifteen minutes to pick out. I was a framing carpenter, not a tackle shop guy, and nobody had ever shown me the part where you flip the bail by hand instead of cranking the handle. Once somebody showed me, it took maybe ten minutes a reel, and I have not fought a bad tangle since. This is that walkthrough, the way I would explain it to my son Kyle over the tailgate before we hit the lake.
You can do this with any spinning reel, but I do it on my Piscifun Viper X, the 3000-size I bought last spring to replace an old reel whose drag had started to slip. It sits on a 6'6" medium rod and it has handled bass, walleye, and panfish all season. The steps are the same no matter what reel you own, so grab your reel, a fresh spool of line, and ten quiet minutes.
Start with a reel that won't fight you
Spooling is easier, and casting is smoother, when the reel itself is solid. The Piscifun Viper X is the reel I used for every step below, and it is the one I reach for on most weekends.
Amazon Check Today's Price on Amazon →Step 1: Match the line to the reel and the fishing you actually do
Before you spool anything, decide what line you are putting on. For a 3000-size spinning reel like my Piscifun Viper X, I run 10-pound braid for bass and walleye, and I have used 8-pound mono when I wanted a little more stretch for trout. Last May I spooled it with fresh 10-pound braid the night before the opener, and that Saturday a 19-inch walleye ran line out three times before I landed him. The line held because the spool was filled right. The reel's spool will have a line capacity printed right on it, something like 200 yards of 10-pound mono or 180 yards of 10-pound braid. That number is your guide, not a law, but it keeps you from overfilling or underfilling.
Here is the part most people skip: fill the spool only to about an eighth of an inch below the spool lip. Too much line and casts start to loop and tangle. Too little and you lose casting distance and the drag has less line to work with. I have made both mistakes, and the fix is always the same. Strip line off or add a little backing until the fill looks right.
If you are switching line types, tie a backing knot. I run a short length of cheap mono as backing, then an Albright knot to connect the braid. It sounds fiddly, but it takes two minutes and it means I get full use of the reel's capacity without buying a giant spool of expensive line.
Step 2: Run the line through the rod guides first, then tie it to the spool
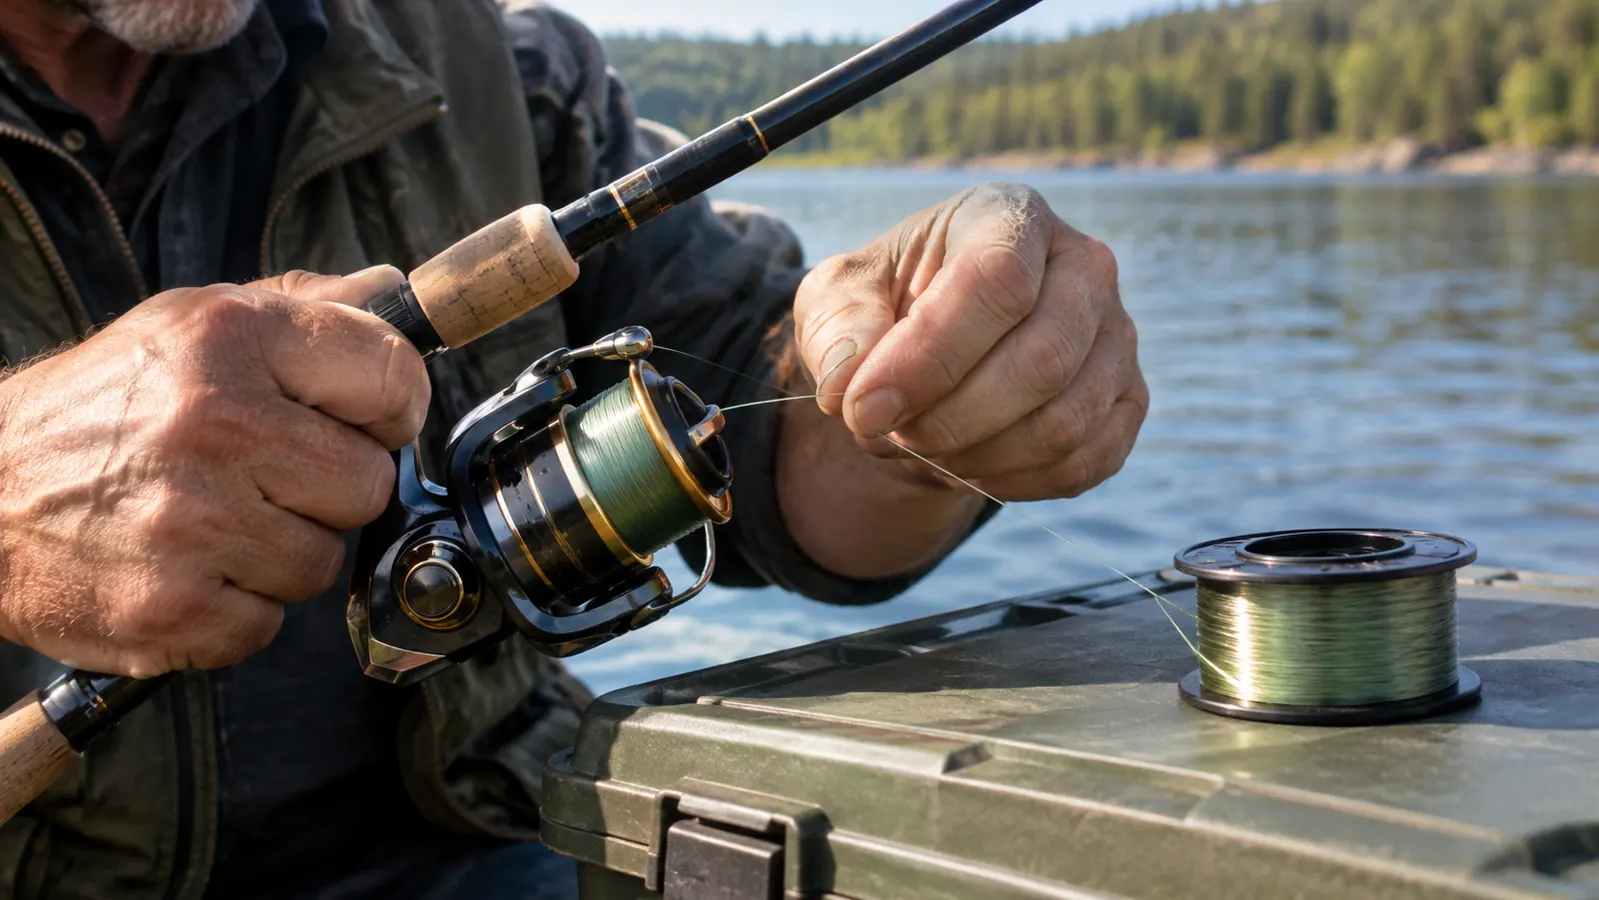
This is the step I got backwards for years. Thread the line up through the rod guides, then through the reel's line roller, then tie it to the spool. If you tie the line to the spool first and then try to thread the rod, you end up with a mess of slack line and a reel that wants to unwind.
Use an arbor knot to tie the line to the spool: wrap the line around the spool once, tie an overhand knot in the tag end, then pull tight so the knot seats against the spool. Trim the tag end close. A bulky knot here will thump through the guides on every cast, and it can catch on the line roller.
One more thing while the line is slack: close the bail by hand. Do not crank the handle to close it. Cranking the handle twists the line before you have even started filling the spool, and that twist is the reason your first cast birds-nests. I learned this the hard way on a trout creek near home, when a brand new spool of 6-pound mono turned into a coiled mess on the second cast. Flip the bail over with your fingers, pull the line snug, and you are ready to fill.
Step 3: Fill the spool under tension, with the line coming off the filler spool the right way
Here is the whole trick to spooling a spinning reel without line twist: the line has to come off the filler spool the same way it goes onto the reel spool. For most filler spools, that means the label faces you and the line comes off the spool counterclockwise. If the line comes off the filler spool the wrong way, you are putting a twist into every wrap, and that twist shows up on the water as loops and wind knots. The cheap way to check: lay the filler spool on the table and peel a foot of line off. If it curls into tight coils, flip the spool over and try again. If it lies flat, you have it right.
Hold the filler spool flat on the floor or on a towel on the tailgate, label side up. Run the line through your fingers and apply steady pressure as you reel. The line should go on tight, with no soft spots you can push down with a thumb. I check the fill every twenty or thirty turns by running a thumb down the spool. If I feel a soft spot, I add pressure with my fingers for the next few cranks rather than starting over. If you can press into the line with your thumbnail, you are not using enough tension.
I like to lay the rod flat on the tailgate of my pickup for this, reel facing up, and run the line through my fingers as I crank. It keeps the angle steady and the tension even. Fill to that eighth of an inch below the lip, then stop. Overfilling a spinning reel is the fastest way to turn a good reel into a tangle machine.

Step 4: Set the drag so the fish wins the fight, not the line
Drag is the part everyone gets wrong, and I did too until a walleye spooled me one evening in early June. I had the drag cranked down tight, the way you do when you are not sure what to do, and when that fish hit, it took line like the drag was not there. The line snapped at the knot and I stood there holding a rod with nothing on the end of it. That was the night I looked up how drag is supposed to work. The drag should slip before the line breaks, and it should slip smoothly, not in jerks. On the Piscifun Viper X, the drag is a carbon fiber disc, which is the smooth kind. You set it by tightening the star drag wheel on top of the spool, but you do not just crank it down and hope.
Here is the method I use. Tie the line to something solid, a fence post or a buddy's hand with a glove on it. Point the rod at the post, then pull line off the reel by hand, smoothly, until the drag slips. Adjust the star wheel until the line gives at a pull that is firm but not a hard jerk. For 10-pound line, I want the drag set so it slips at maybe a third of the line's rating, so around 3 to 4 pounds of pull. That sounds light, but a big bass can pull far harder than you think, and a slipping drag beats a snapped line every time.
Once you have that setting, back off the drag a half turn when you store the reel. It takes the pressure off the carbon fiber washers and keeps the drag smooth for years. I have used my Piscifun all season and the drag still feels like it did the day I bought it, which is exactly what I wanted after my old reel started slipping at the worst possible moments.
Step 5: Test the whole setup before you head to the water
A spooled reel is only half done. Before I leave the driveway, I tie a practice plug or a small sinker to the line and make a few casts in the yard. I am watching for two things: line that comes off the spool in smooth loops, and a drag that slips when I pull hard on the line afterward. If the line loops or coils, I strip it off and redo the spooling, because the twist is already in there and it will not fix itself on the water.
Then I set the hook the way I fish: cast out, close the bail by hand, and reel in until the line is snug. I pull the rod back against the drag a few times to feel how it gives. If it feels like it is about to break the line, I back the drag off a quarter turn. If it feels like the fish would run line out too easily, I tighten it a quarter turn. Ten minutes of fiddling in the yard saves an hour of frustration on the lake. The first season I owned this reel I skipped the yard test and paid for it: first cast off the bank at Cayuga Lake came off the spool in a loop and I spent twenty minutes picking out a wind knot while the bass were hitting. Now I do the test every time, even when I am running late.
One last habit: after every trip, I rinse the reel with fresh water, dry it with a towel, and back the drag off half a turn. That routine takes two minutes and it is the reason my Piscifun Viper X still feels smooth at the end of a full season of bass, walleye, and panfish.
What Else Helps
A few extras make the whole job easier. A line spooler tool, which is a simple spindle that holds the filler spool, costs a few dollars and keeps the line coming off perfectly flat. I did fine for years without one, holding the spool on a pencil between my knees, but the tool does make the job more foolproof, especially for my son Kyle, who was spooling his own reel for the first time this spring. A pair of line cutters on a retractor lives on my tackle box, because you always need to trim a tag end. And a spare spool of line in the truck means you are never stuck fishing with a twisted mess because you could not fix it until you got home. I keep a spool of 10-pound mono under the back seat of the pickup all season. It saved a trip last summer when Kyle's reel came up with a tangle that was beyond fixing on the water.
If you are in the market for a reel to practice this on, the Piscifun Viper X is a good one to learn with. The drag is smooth, the spool is easy to fill, and the price is fair for what you get. I have written a longer review of it after a full season of use, and I compared it side by side with the KastKing Centron if you want to see how it stacks up. And if you want to know why a smooth drag matters so much in the first place, I have a piece on that too.
Fill the spool to an eighth of an inch below the lip, close the bail by hand, and set the drag to slip at about a third of your line's rating. That is the whole job.
Do it once, do it right, fish all season
Spooling and drag setup take ten minutes when you know the steps. Pair them with a reel that has a smooth carbon fiber drag, and you can stop fighting tangles and start catching fish.
Amazon Check Today's Price on Amazon →